Social Icons

Friday 3 December 2010

Electifying Energi Balok Tutorial

Berikut adalah efek yang besar yang akan membawa beberapa energi untuk subjek Anda. We'll be wrapping this singer's arm with a glowing beam of light, adding sparkles, and adjusting the colors to make it all seem magical. Kami akan membungkus lengan penyanyi dengan seberkas cahaya bersinar, menambahkan berkilau, dan menyesuaikan warna untuk membuat semuanya tampak ajaib.
Firstly, create a new layer, then grab your Pen Tool (P) and draw out a spiraling path, as if you have a snake wrapped around the arm. Pertama, membuat layer baru, kemudian ambil Anda Pen Tool (P) dan menarik keluar jalur spiral, seolah-olah Anda memiliki ular melilit lengan.
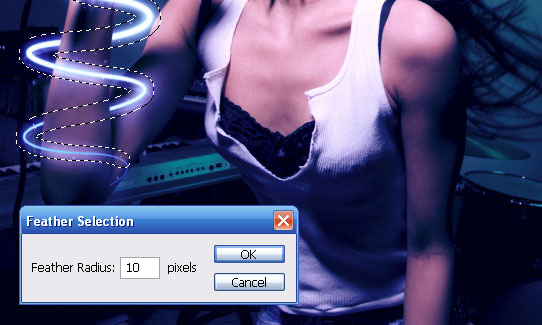
Then select the Brush Tool (B) and set your diameter to 7px, with the Opacity and Flow at 100%, and your foreground color set to white. Kemudian pilih Brush Tool (B) dan set diameter ke 7px, dengan Opacity dan Flow sebesar 100%, dan warna foreground ditetapkan ke putih. With your path still on the artwork, go back to the Pen Tool, right click on the canvas, and choose "Stroke Path." Dengan jalan Anda masih pada karya seni, kembali ke Pen Tool, klik kanan di kanvas, dan pilih "Stroke Path." A menu will appear with the Brush set as the Tool. Sebuah menu akan muncul dengan kumpulan Brush sebagai Tool. Check "Simulate Pressure" and press OK. Periksa "Tekanan Simulasikan" dan tekan OK. This will make the beginning and end of your stroke thinner. Ini akan membuat awal dan akhir Anda lebih tipis stroke.
Now you need to delete the parts you want hidden behind the arm. Sekarang anda perlu menghapus bagian yang Anda inginkan tersembunyi di balik lengan. With your stroke layer selected, choose "Add layer mask" at the bottom of the Layers Palette. Dengan lapisan stroke yang dipilih, pilih "Add layer mask" di bagian bawah Palette Layers. Use the Polygonal Lasso Tool (L) to select areas of the arm you want in front of the stroke -- use your eye and imagine how this path will wrap around the arm. Gunakan Polygonal Lasso Tool (L) untuk memilih area lengan Anda inginkan di depan stroke - menggunakan mata Anda dan bayangkan bagaimana jalan ini akan membungkus lengan. Make sure your mask is active by clicking on it, and fill these selected areas with black. Pastikan masker Anda aktif dengan mengkliknya, dan mengisi area tertentu dengan warna hitam. They should now be cut out, appearing as if they're behind the arm. Mereka sekarang harus dipotong, muncul seolah-olah mereka berada di belakang lengan.
Right click on your stroke layer and choose Blending Options. Klik kanan pada layer stroke Anda dan pilih Blending Options. A Layer Style menu will appear, where you'll be adding an Inner and Outer Glow to the stroke, making the edges of it glow with a blue hue. Sebuah menu Layer Style akan muncul, di mana Anda akan menambahkan Inner dan Outer Glow untuk stroke, membuat tepi itu bersinar dengan warna biru. Use the settings below: Gunakan pengaturan di bawah ini:
Make a copy of your stroke layer and right click on the Layer Effects icon. Buat salinan lapisan stroke Anda dan klik kanan pada ikon Layer Effects. Choose "Clear Layer Style" -- we simply want to blur this layer (about 6 pixels) to add another layer of glow. Pilih "Clear Layer Style" - kami hanya ingin blur layer ini (sekitar 6 piksel) untuk menambah lapisan lain cahaya. Everything's looking nice and illuminated here, so let's add some sparkles. Semuanya terlihat bagus dan diterangi di sini, jadi mari kita tambahkan beberapa berkilau. With your Brush Tool, add some quick spots around your glowing path with varying small brush sizes (3 - 5px). Dengan Anda Brush Tool, tambahkan beberapa tempat di sekitar jalur cepat bersinar Anda dengan berbagai ukuran sikat kecil (3 - 5px). Make as many as you want here, as you're always free Erase undesired sparkles. Buatlah sebanyak yang Anda inginkan di sini, karena Anda selalu berkilau Erase bebas yang tidak diinginkan.
We're now going to make a secondary stroke to create another level of motion. Kita akan membuat stroke sekunder untuk menciptakan tingkat lain gerak. Use the Pen Tool to go over your original path, but make it a bit different and overlap parts. Gunakan Pen Tool untuk pergi ke jalan asli Anda, namun membuatnya sedikit berbeda dan tumpang tindih bagian. Select a smaller diameter brush this time with a 50% opacity, and stroke the path as before. Pilih diameter yang lebih kecil sikat kali ini dengan opacity 50%, dan stroke jalan seperti sebelumnya.
Our energy beam is nearly there. balok energi kami hampir sampai. To make the effect more dramatic, you can adjust the overall hue of your photo. Untuk membuat efek lebih dramatis, Anda dapat menyesuaikan warna keseluruhan foto Anda. Create a new Curves adjustment layer, and tweak the colors to get a vibrant blue atmosphere. Buat layer Curves penyesuaian baru, dan men-tweak warna untuk mendapatkan suasana biru bersemangat. Download the Curves preset below to load it in your document. Download preset di bawah ini untuk memuat dalam dokumen Anda Curves. After your colors are locked in, use the Dodge Tool (O) (with a diameter of 35 pixels and the exposure set to 25%) to brush in some highlights underneath your beam, directly on the background photo. Setelah warna Anda terkunci di, gunakan Dodge Tool (O) (dengan diameter 35 pixel dan eksposur set menjadi 25%) untuk menyikat di beberapa menyoroti bawah balok Anda, langsung pada foto latar belakang. This makes it appear as if your beam is casting light on to the arm. Hal ini membuat seolah-olah Anda adalah pengecoran balok cahaya pada lengan.
Download blue.acv Download blue.acv
For the last part of this effect, we'll add one more layer of shimmer. Untuk bagian terakhir efek ini, kita akan menambahkan satu lapisan lebih berkilau. Hold down Ctrl and click on your main stroked path in the layers palette -- your path should now be selected. Tekan Ctrl dan klik pada jalur utama membelai Anda dalam palet layer - jalan Anda sekarang harus dipilih. Go to Select › Modify › and Expand the selection by 7px, then feather it by 10px. Pergi ke Pilih> Modify> dan Perluas seleksi oleh 7px, maka bulu itu dengan 10px.
Now select your background photo layer and apply a Plastic Wrap filter, found in your Artistic filters. Sekarang pilih layer latar belakang foto Anda dan menerapkan Plastik Wrap filter, ditemukan di filter Artistik Anda. This will add some wispy lines around your path. Ini akan menambahkan beberapa baris tipis sekitar jalan Anda. Set the Highlight Strength to 20, the Detail to 6, and the Smoothness to 8. Atur Kekuatan Sorot ke 20, Detail sampai 6, dan Smoothness ke 8. Finally, lightly Gaussian Blur your background layer with the feathered selection still active. Akhirnya, ringan Gaussian Blur layer latar belakang Anda dengan pemilihan berbulu masih aktif.

No comments:

Post a Comment